Finished! Well, not quite. The bench-work is mostly finished. It needs to be sanded off at the ends especially, and I still need to finalize how they will attach to each other. I’m thinking maybe a clip on each side to hold it horizontally, and maybe a door lock thing to hold them in alignment? Other than that, I’m mostly happy. I have photos too, I’ll tell the story from when I started (again – the successful attempt ;-))
July 7th
It starts out with Crash looking like a lazy dog. He really is.
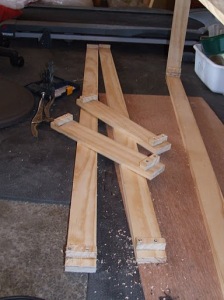
This is an overview of where I was up to on July 7th. The outer frame of one section was complete, and the cuts had been made for the second section, with pieces screwed in to line the up, it was ready to glue and screw together.
These are the pieces. Give or take (I measured them to be the same length as each other, not to an exact number of inches) they are 2x 5 foot pieces and 2x 1.2 foot pieces. Screwed and glued into each are two 3/4″ x 3/4″ pieces which are used to easily align each piece with it’s join partner. They are then glued at the corners and clamped together for a couple of hours, then screwed. Below, an end has been glued and clamped.
July 8th
I realized that there wasn’t a great deal of structural support, and that for sections that are likely to be pulled out and put away fairly regularly support is probably a good idea. So I measured and cut two support pieces to fit roughly half-way down each section and then drilled three half-inch holes for wiring to go through, and glued and screwed in the same way as the rest of the base. Here, the first is clamped and waiting for glue to dry.
The support supports are gluing on the second frame, when these are dry some more they will be screwed down into the outer frame and the support will be glued to them and then screwed.
I hung out with Crash for a bit while the glue dried!
The frames were finally finished. One is fairly warped, but I don’t plan on exhibiting this layout and it’ll likely be warped with time and transporting anyway, so I’m not overly worried. With the ply nailed down, it doesn’t seem too terrible. I doubt it will cause any major issues (famous last words?)
July 9th
“I claim this foot in the name of Doglandia Forever Woof Woof!”
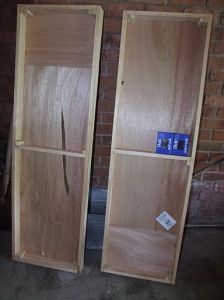
I nailed down the tops this morning. Here are both from the bottom…
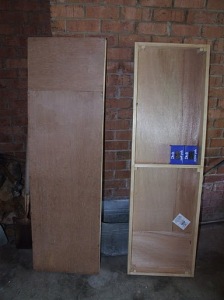
And one from the top. Basically, because they are 5 ft by 1.5 ft each, I used a 4ft square piece of ply and cut two lengths of 4′ x 1.5′ and then two pieces of 1′ x 1.5′ and had a 1′ square left over.
This is the end of one of the sections – both sections have one end like this (I guess the sides weren’t exactly 5′ long!) and one has sides that are a little like this too. They’ll both get sanded back at some point, probably next week now.
I only had 3 incidents while nailing. Two like this, where I nailed at an angle far enough that it poked through the frame. One on each section, and I was able to push them back out so that with some sanding they probably won’t be noticed. I’m considering some 1×4 to go around this all, partly for strength, partly for keeping most track below top surface level (and thus protected a little more). The third incident was near the end of the first section. I’d been using a pair of vice grips to hold the nails to try and keep them vertical, and I elected to do one with just my fingers. Some of you may have seen my earlier tweet that read “OW! Thumb + hammer = pain” – and that’s precisely what happened. Fortunately it is my left thumb that is afflicted, so while it is still pulsing a little (some two hours after I hit it) it’s not causing me too much problem.


