A True One-Day Project

Do you hear about one-day projects? 24 hour turnarounds? Things to do in a weekend?

Have you ever looked at the instructions, and the expenses and decided that it is way too expensive, or that there is no way you could ever finish the job in the time suggested?

I know I have, on many occasions. So many things I could have accomplished if I had twice the time allotted. Or twice the money suggested.

This project is slightly misleading, because the most expensive part was actually the cheapest. On Saturday we took two trips to Harrisonburg, firstly for a wedding and the second for dinner. On the way out the second time, I noticed sitting in a driveway a large piece of furniture with a sign saying “Free You Haul!” This was to be the cornerstone of our Sunday activities.

We’ve been meaning to clean up “the green room” for a while, it is where a lot of our stuff is stored, it is also where my desktop is, and was a work room before we realized there was nowhere near enough space. We’ve also been looking for more storage options, because while bookshelves are good, they aren’t the be-all and end-all of our problem. This item, which turned out to be a buffet, seemed ideal.

And so that is how my Sunday morning started. We got in the truck and drove the mile or so to the place, were excited to find it still in situ, and loaded it. We drove home, unloaded, and assessed.

The two end doors were off, and needed to be reattached (we pulled them right back off again after we started actually planning..). There was putty or something along the top and the sides, which appears to be filling in a design, but it would have been too time consuming to take it all off and so we elected to sand it smooth and just paint it, like the rest.
This is what we started with. Two drawers, and three doors to a long combined shelf. According to the stencil on the back it is made of Walnut. It was light enough (until we painted it) and in relatively good condition. We presume it to be fairly old, as the center and right-hand doors don’t seem to fit quite right. We may never know!

Anyway, this is what we started with. We began by eating lunch. An excellent way to start, in my opinion! We then headed to Harrisonburg where we visited Walmart (Crash needed food) and then Home Depot where we purchased unto ourselves a quart of red paint ($14), a spray can of chalkboard paint ($5) and a roll of masking tape ($3). Total cost was approx. $24, including tax.

The first job was to sand down. There was a layer of varnish, easily taken care of. We also pushed back the layer of…whatever it was…to about where the fascia was showing through in most places.

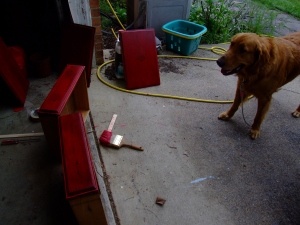
Next Kelly painted the doors while I started painting the top surface. Crash hung out and supervised.

With one layer of paint on, we moved inside to start working on cleaning the room.

Two hours go by…

We came out to check how it was going. It was supposed to take around two hours to dry, and parts of it needed a second coat. While Kelly was working on that, I masked off the doors and broke out the chalkboard paint. Kelly wanted blackboard surfaces to write on so she could write lists of what was in the drawers and such, and be able to rub things off and such without having to completely relabel things, or be crossing things off on paper and being messy. She has suggested the same thing for a future kitchen, but the idea of chalk dust and food in the same vicinity makes me a little uneasy. This will, however, give me a chance to see how it works in practice (without the food!) and be able to make a more educated choice.

Now, the chalkboard paint is a spray on. It dries to a point of touch-up after 20 minutes (which we utilized), and after 24 hours is safe to draw on. Something to keep in mind if you are planning it for a child’s room, or similar. Don’t give them the chalk until the next day! For us, we didn’t have any chalk and so Kelly was planning to pick some up while at work, which meant it would be around 22 hours anyway.

Around this time we organized food. Two medium pizza’s from Dominos, please! Good times. I finished mine on Monday.

We touched up the doors and finished clearing a path in the green room to where we wanted to put the thing. The plan was to put it under the window (where we had storage boxes and such).

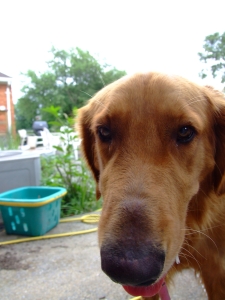
Crash approved.

Once the chalkboard paint was finished (another 20 minutes later), we reattached the handles and then reattached the doors.

We gave the other paint a few more minutes to dry while we checked clearance for moving it inside.

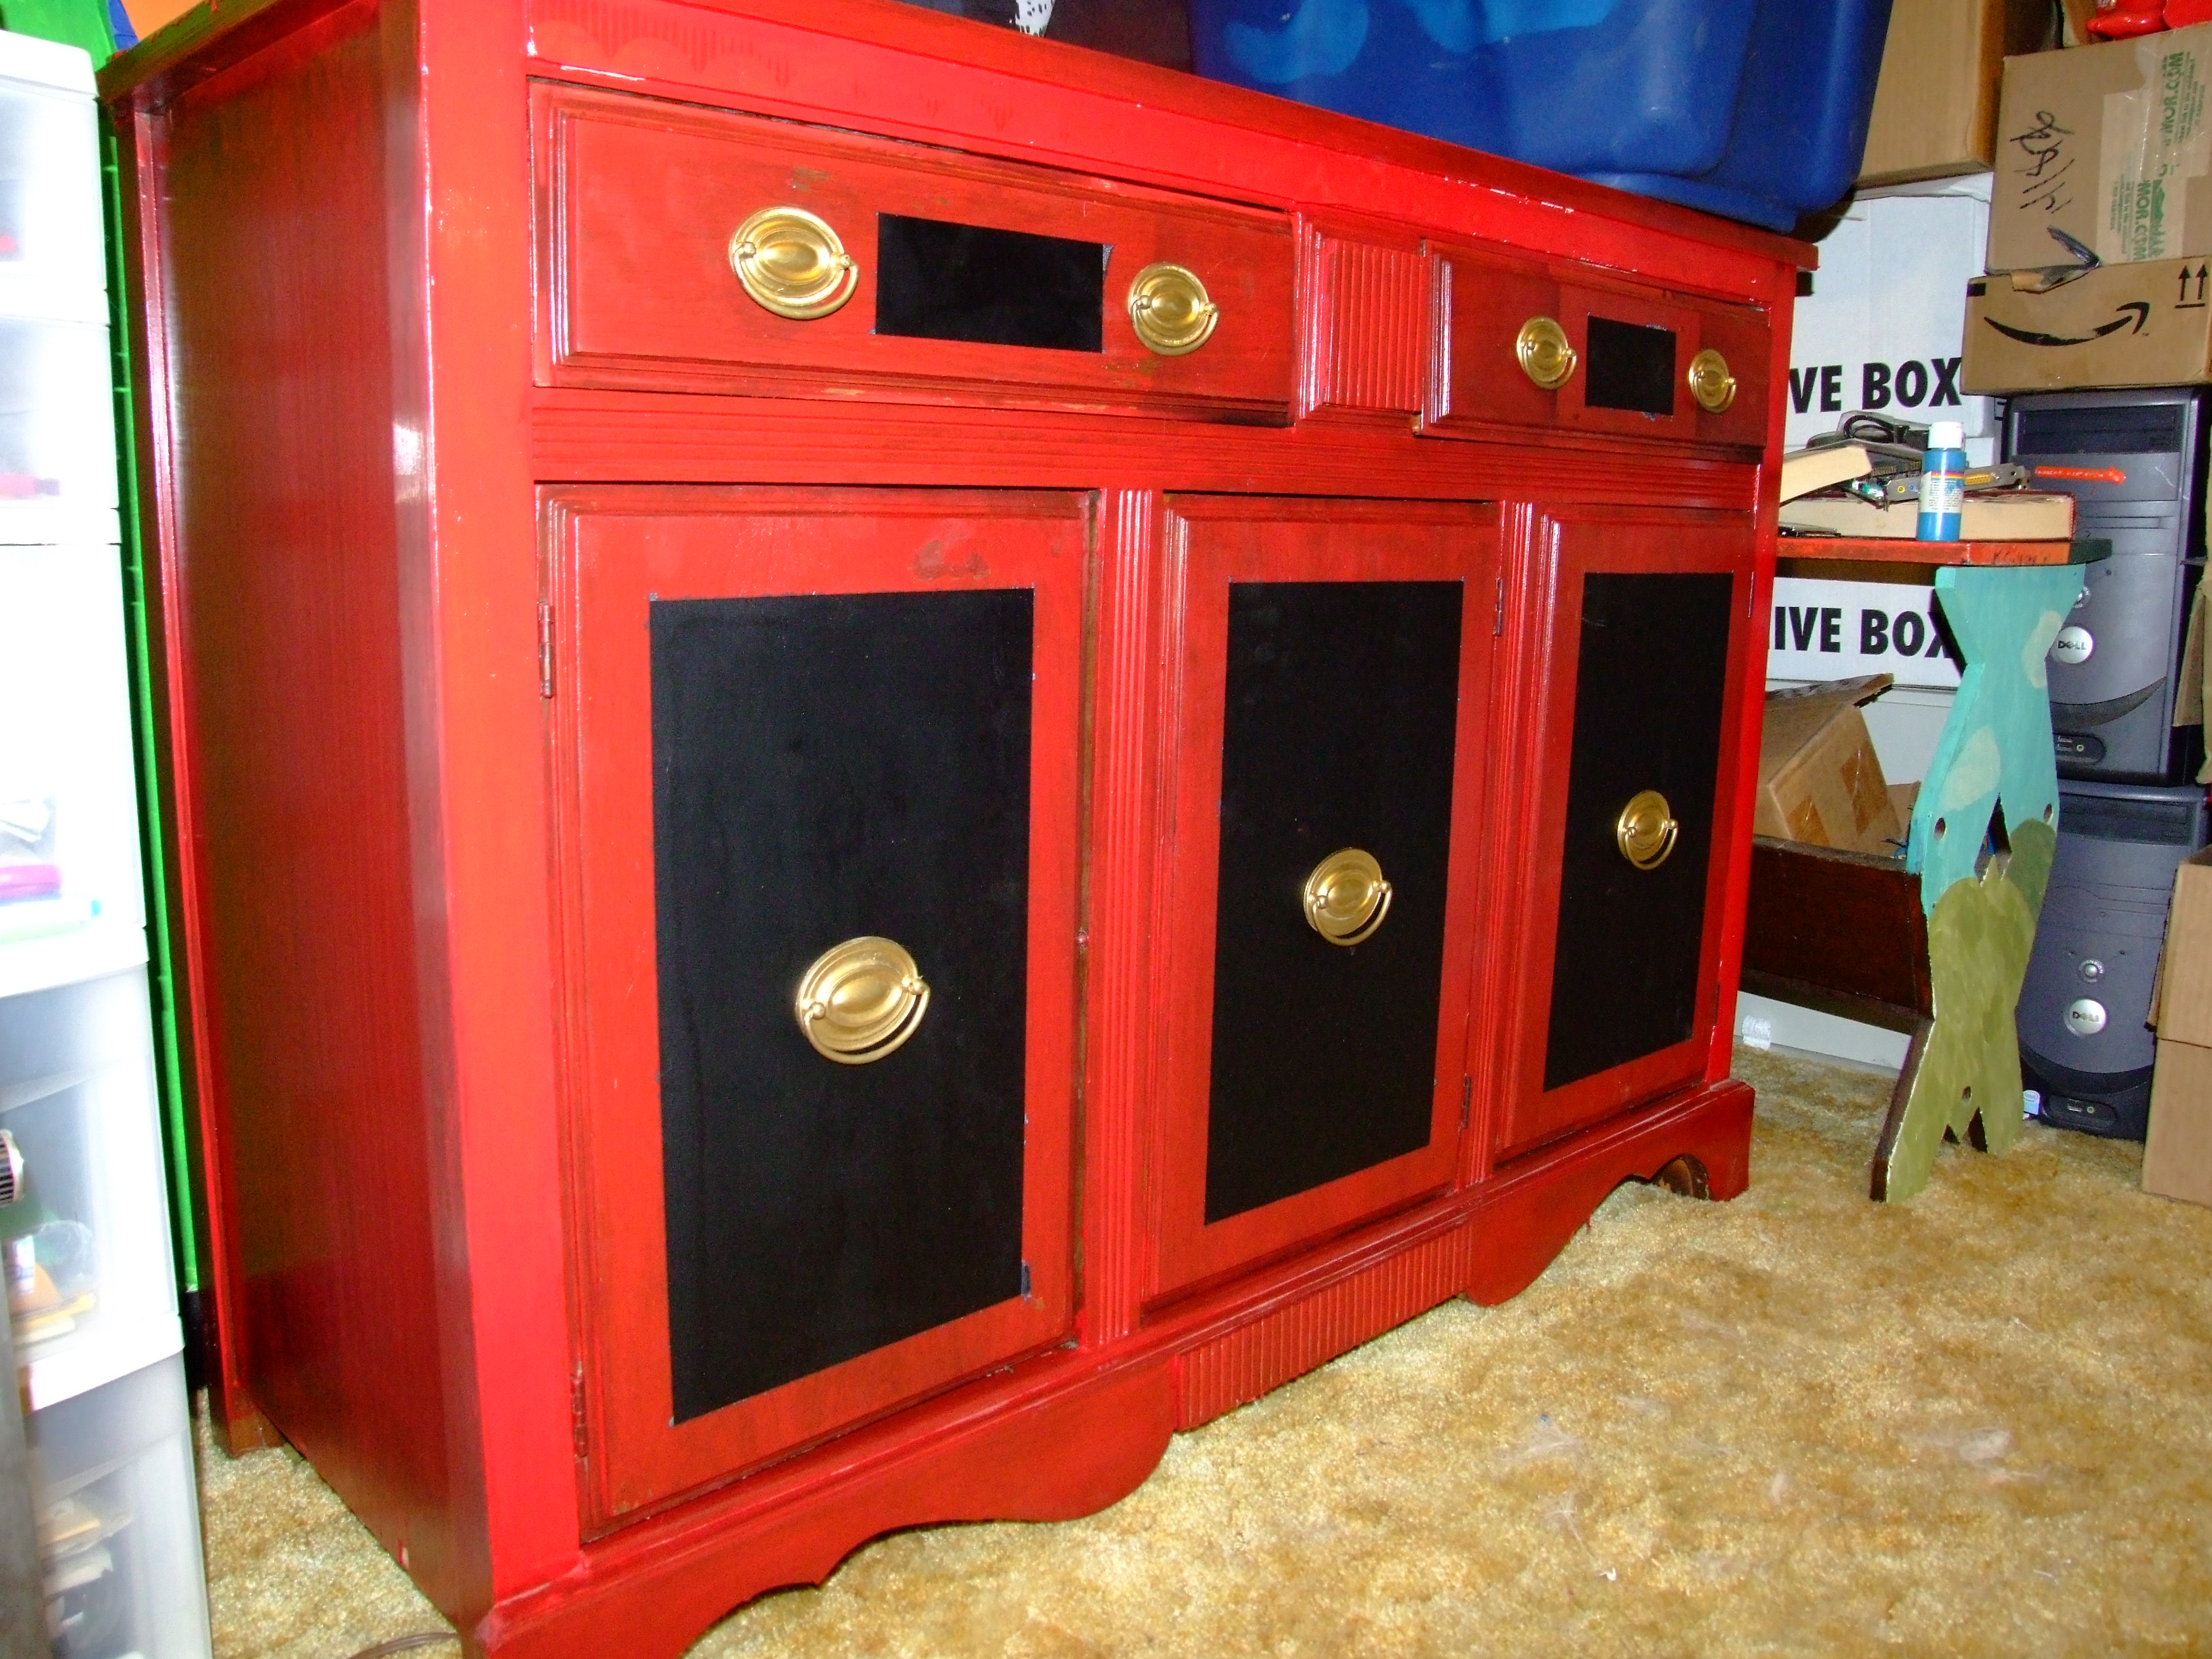
Now in place in it’s new home, it actually looks pretty good. The plan, for now, is to use it as an art/storage cabinet where it won’t be seen by a lot of people. If it moves to a more public location after we move then we may need to consider at least touching up in places that we rushed.

Looking at the photo time stamps, we took about 3.5 hours from arriving home with the supplies (we picked the thing up at about 11 in the morning, arrived home with paint and such at 2:45. We moved it into the house around 8:10-8:15).

Not bad, really..

Exciting Times

It has been quite a while! Yesterday was my birthday and a number of people came to help me celebrate my first quarter-century of life. Thanks to Ben and Bethany for the awesome looking game, to Katie for the book (the title of which is unrepeatable in a forum such as this) and to Kelly for the deep fryer! Also thanks to Kelly’s grandparents for the money. A weird thanks also goes to our neighbors for letting us borrow the gas for the grill!

It was a very good weekend overall. We spent Saturday in Clifton Forge (a railroad town about two hours away) where the C&O Historical Society had a large event. The C&O 614 locomotive was on display along with old passenger cars available to walk through. The volunteers were very proud of their work, and so they should be! We walked through a combined coach/baggage car as well as going through a dining car. The interior of the dining car has been restored to it’s 1930s appearance, the exterior to it’s 1950s appearance and the kitchen has been modernized to use gas (rather than charcoal) and other modern appliances so that it can actually function when they want to use it.

I walked through the cab of an old diesel unit (I want to say a GP-9, but not certain) where a retired engineer was happy to talk to anyone who asked about different functions it had – or didn’t have. Certainly a cool experience that I don’t recall having had since moving to the US.

There was also a miniature railway providing rides for people around a large loop as well as various vendors selling their items. I picked up an N-scale locomotive for $30 which is planned to go into service on my coffee table layout which has been revitalized recently.

An interesting idea I saw was a pair of statically active steam whistles. Basically I suspect there is a small steam boiler in a brick building, on top of which is mounted two different steam whistles of different pitches. Each of these are linked to a stereotypical rope and wooden handle which can be pulled to make the whistle sound.

On Sunday we spent most of the day being lazy before people started to arrive. We cooked out as planned (the weather held up long enough to cook and eat) before having to rush everything inside due to rain. I hope everyone enjoyed the food even though it took a little longer than planned. The one thing I didn’t think to check was how much gas there was in the bottle for the grill and we ran out after a few minutes. Fortunately our neighbors have a gas grill and we were able to borrow their bottle!

Later in the evening we played Funglish, a word game which is rather entertaining. It works kinda like pictionary where teams take turns playing. One team will have a card with 6 words on it, and a board which has the options “Definitely,” “Kind of,” and “Not.” Spread out in front of them are different adjectives which are placed on the board in order to describe the word on the card. Bart Simpson, for example, was Definitely yellow, American and man-made, kind of human, etc. With the number of teams we elected not to score the rounds but we had a whole lot of fun anyway.

I didn’t get too many photos of the Sunday events but those from Saturday will likely be on flickr at some point soon.

Thanks again to everyone that came and/or wished me a happy day, I only hope your time was as good as mine!

Selling Jewelry (Or Jewellery, for my NZ Friends)

I am a man. Not the manliest of men, I’m not great at physical labor. I’m not amazing at physical sports. I shy away from physical confrontation whenever possible. But I am undeniably a man. I’m not a particularly girly man, I don’t try to wear women’s clothing or particularly enjoy shopping. I do, however, enjoy organizing things and coordinating activities.

And that, dear reader, is why I am selling jewelry. You may or may not be aware that my lovely wife enjoys making earrings, and often sells them at craft shows and such. You may or may not be aware that attempts to sell them online have not always come to much. So we decided to combine our strengths and try a team effort in online merchanting. This week we started our master plan. I registered a new store on Etsy, called Flying Glibbies. We also registered a domain name and set up a website, flyingglibbies.com. Many changes are yet to come this week as we continue organizing and getting things together, but hopefully we will have items available for purchase by the end of the week.

The goal is to sell different kinds of things, but to start with several pairs of earrings will be made available. I’m also working on some wood crafts of a couple of varieties, and will also sell some large prints of photos. Watch this space!

A Range of Updates!

So, there are a few new things worth reporting.

Firstly, my performance review at work came in, and I scored a fairly solid 3/5. Not bad, considering I’ve been there just coming up 6 months (was 4 at the end of the 2010 calendar year). I have a few things to work on, but don’t we all?

Also work related, there is a full time position opening on day shift, which I think I will at least apply for. There are several others in the lab that are interested, all of whom have been there longer than I have and so I don’t doubt that they would get it over me. Still, if I don’t try I can’t ever hope to succeed.

I’ve been to Charlottesville a couple of times in the last month or two, and had a great time. I’m sure there must be more, but so far I’ve only found one hobby shop that was where the maps and information on the internet told me it would be (and even then, I’m not sure it’s one of the ones on the list!) It was near Kroger on 29, not marked very visibly but big “Thomas Trains Here” and “Lionel Trains Here” signs in the windows. I have also spent a fair amount of time sitting around near the Amtrak station near down town, as this is where two fairly busy railroads cross. The Norfolk Southern running North-South to Manassas and Lynchburg sees several trains a day. The CSX running North-East-West (the division, leased by the Buckingham Branch Railroad) connects with the NS at Orange to the North, CSX to the East and through Staunton on to Clifton Forge to the West). There is also daily Amtrak traffic (though I’m not usually there early or late enough to see the majority), in the form of the New York to New Orleans train, the New York to Chicago train (three days a week) and the Washington DC to Lynchburg train.

I’ve also found that US-250 is a great alternative to I-64. The interstate cannot be matched for speed at all, but it’s still a great drive over Afton Mountain. At some point I’d like to visit Afton and explore the area a bit more, but for now I’ll settle for having driven past it.

Last but not least, is the model situation. I’m still waiting for my ATX cables to arrive (hopefully they didn’t get lost, or not sent..) so the sections are still leaning up against the wall, same as they were last time I posted. I do have updates, however. A couple of months ago I found that Ollies, a discount store that lives on buyouts and the like, has a fair stock of IHC products. The range isn’t great, a couple of buildings and a few vehicles, a LOT of MoPac RPO cars ($5.99 each, if anyone is looking for some..), but they are CHEAP. I picked up a Factory/Office building kit (constructed over the weekend!), a set of Algoma Central passenger cars (I have plans to model a kind of historic railroad running on a Class I/II when I get around to modeling big), and a few trucks and such. I have a greenhouse which will need some modifications to be realistic enough, and a bunch of “village” accessories which will need some attention before they are considered suitable (by me!).

In the Factory/Office kit were some molded people who I finally got around to painting today. I’m not entirely happy with them overall, but considering I’ve never painted anything in HO before, I’m pretty happy with my first try.

I don’t have any photos to post today, but maybe next time. Trainspotting photos from C’ville will be up on Flickr soonish.

Brief Update – Model Railroad

Yeah, it’s another one of those.

My terminal strips came in, and I’ve now completely wired the track blocks on both sections. Now I just need the other ATX extensions to arrive so I can wire the connections between the two sections and start running trains again.

A week or two ago I pulled out a scrap piece of plywood (roughly 1’x8′) and laid out the track work for a time-saver layout. At some point I think I’ll get things together to build frame work and put that together as well – I like the game aspect of it. I already have a short list of things I’ll do differently – for one I plan to lay cork under the track. I want to try different wiring techniques like soldering to the bottom of rail joiners – we’ll see how that works out. Once track is laid and wiring is done it will certainly take a back seat to the slightly bigger project (the one I’m working on now).

The current layout doesn’t have a name yet… I haven’t come up with something that I like that I can enjoy. I thought about “Dufflyn,” because it is a location at the end of a branch line, ie “End of Line” -> “[En]Dufflyn” but I still think it’s a little too cheesy.

Model Trains Update

It’s been a while since I posted an update on where my model is at, mostly because it’s been a while since I did anything really observable.

Recently, however, I brought the two sections inside from the garage and did a lot of work on wiring them properly. I’ve also bought some cheap parts to finish the job, and I should be set to finish putting wires underneath some time next week. Then it will be on to building a control panel to tie it all together.

The left section is fully wired for track circuits underneath, and this is where the main connection with the control panel will be. The two sections will be electrically connected using 20-pin ATX cables – one side will have a male connector and the other will have a female, and a small extension cable will connect the two together. Connecting to the control panel is another story – a 24-pin ATX connection is being used to begin with, but it won’t be enough on it’s own. This is still to be decided..

The right section is primarily wired for track circuits – I’m awaiting some terminal blocks to arrive so I can wire them all the way to the end. Also, once terminal blocks arrive I can really get moving on wiring turnouts – at present I have one pair of turnouts (a crossover on the left section) wired to a terminal block, but then I ran out of terminals, and so it stalled.

I’m shortly expecting a set of couplers to arrive, ordered for my 4 IHC passenger cars to bring them ‘up to standard’ (IE, have knuckle couplers..). They should be here tomorrow! I also have a bunch of LEDs and resistors for an upcoming project to change the way my locomotive lights work. Hopefully it will also be easily transferred to DCC when the time comes.

I was surprised to find a train set at Gift and Thrift in Harrisonburg a week or so ago, and I bought some parts of it. A Great Northern box car which will end up as scenery, a Chessie System caboose which will also be scenery, and three small Bachmann hoppers (two N&Ws and a Southern). These are on my list to replace with knuckle couplers too, however I need knuckles with a mounting hole smaller than that of a #5 Kadee, but larger than that of a typical Tyco model. I suspect further research is required!

So, hopefully by the end of this coming week I may be able to run trains again! We’ll see.. Here are some photos. I apologize for the lack of quality, I used my cell phone camera!

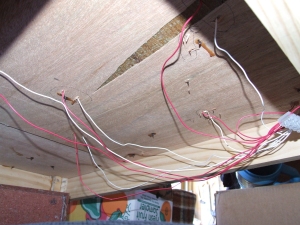
This is the underside view of the wiring for the first pair of turnouts to a terminal block. This will eventually be wired to the main terminal block (to the left in photo).

And this is the top view.

This is the left hand module, to the left is the main terminal block which has all 8 blocks of track circuits wired for both sections plus common. To the top is the connection to the right hand section, which is yet to receive the remaining turnout wiring.

This is an overall underside view of both sections.

And an overall top-side view of both sections.

This is the underside view of the wiring for the first pair of turnouts to a terminal block. This will eventually be wired to the main terminal block (to the left in photo).

Hapless, Helpless, Hopeless

WARNING: This blog entry is long and has a high “Boredom Potential.” You begin reading at your own risk.

hap·less

/ˈhæp lɪs/ [hap-lis] –adjective
unlucky; luckless; unfortunate.
Origin:
1560–70; hap1 + -less
—Related forms
hap·less·ly, adverb
hap·less·ness, noun

—Can be confused:  hapless, haply, happily.
—Synonyms
miserable, woebegone, wretched, forlorn; pathetic, pitiable.

help·less

/ˈhɛlp lɪs/ [help-lis] –adjective
1. unable to help oneself; weak or dependent: a helpless invalid.
2. deprived of strength or power; powerless; incapacitated: They were helpless with laughter.
3. affording no help.

Origin:
1125–75; ME; see help, -less
—Related forms
help·less·ly, adverb
help·less·ness, noun

hope·less

/ˈhoʊp lɪs/ [hohp-lis] –adjective
1. providing no hope; beyond optimism or hope; desperate: a hopeless case of cancer.
2. without hope; despairing: hopeless grief.
3. impossible to accomplish, solve, resolve, etc.: Balancing my budget is hopeless.
4. not able to learn or act, perform, or work as desired; inadequate for the purpose: As a bridge player, you’re hopeless.

Origin:
1560–70; hope + -less

—Related forms
hope·less·ly, adverb
hope·less·ness, noun
—Synonyms
1. irremediable, remediless, incurable. 2. forlorn, disconsolate, dejected. Hopeless, despairing, despondent, desperate all describe an absence of hope. Hopeless is used of a feeling of futility and passive abandonment of oneself to fate: Hopeless and grim, he still clung to the cliff. Despairing refers to the loss of hope in regard to a particular situation, whether important or trivial; it suggests an intellectual judgment concerning probabilities: despairing of victory; despairing of finding his gloves. Despondent always suggests melancholy and depression; it refers to an emotional state rather than to an intellectual judgment: Despondent over ill health, he killed himself. She became despondent and suspicious. Desperate conveys a suggestion of recklessness resulting from loss of hope: As the time grew shorter, he became desperate. It may also refer to something arising from extreme need or danger: a desperate remedy; a desperate situation. Despairing and despondent may apply only to feelings.

Three distinct feelings that can be felt despite the conditions being the opposite. Sometimes they are sitting in the background, waving politely to remind you they are there, other times they are in your face yelling and screaming and occasionally kicking you in the shin. At this point, despite my emotional feelings of haplessness, helplessness and hopelessness, let me explain how I am well aware that this is not the case.

The start of this problem goes back a long time, to the beginning, even. It is no one persons fault, and blame cannot easily be placed on any individuals or groups, with few exceptions, and for the most part I suspect they may be ourselves. It probably starts with leaving New Zealand for the US, with high hopes and expectations a little beyond reality, and throughout it is plagued by circumstances far beyond our control. The economic problems play a large part, but it is also compounded by the area we live in and what industry is available, as well as the long and boring game of waiting for someone to do something – like USCIS.

When I left NZ I had a well-paying job, and had high hopes of that experience being useful in my hunt for work, here in the US. More than once after arriving I wondered why I left it. That said, with the economic issues being a global problem there is little guarantee I would have still been employed by the same company, although as with so many decisions in life I have no way of knowing what the outcome of staying (with Kelly moving to NZ) might have been.

Part of our problem was the way we dealt with USCIS. We weren’t 100% on the ball – if we’d gotten it right the first time, I would have had a work permit a lot earlier. If we’d gotten it right the second time, work permits would have been arriving not as early, but not as late. By the time I had an employment authorization card it was February of 2009, and very few places were hiring. We had also had to move out of our apartment (end of Nov, beginning of Dec 08) at this point, because Kelly’s college loans had come due for payments, and we couldn’t afford to pay loans as well as rent. See the next paragraph, but even having had a work permit in October or November (2008) probably wouldn’t have helped unless I had taken a job doing retail or something (I did always say I would work at Walmart if I had to). Kelly quit her job as a barista early in 2009, as the work environment was horrible and causing all kinds of emotional problems, and had begun to cause physical problems as a result. Kelly’s mom had offered to help us with the loans in return for cleaning the house.

Anyway, back to my employment (or lack thereof). It took until May of ’09 to get my first interview, and they turned me down. My first job in the USA was working as a camp counselor at a summer camp. Great job, great times, didn’t pay very well. Kelly had been cleaning her parents house (where we had been living), but was offered a summer job as a babysitter for two awesome kids. All this time we were trying to keep a lid on our debt – not necessarily bringing it down, but paying the minimums so that it wouldn’t hurt us too badly. Summer of 2009 was lived very much on a week by week basis.

The end of summer came, and Kelly had found a more permanent job working for the Harrisonburg Rockingham Child Day Care Center, where she still is! I worked for a couple of months for the Boys and Girls Club in Timberville, but they had issues with me, I had issues with them, and we decided the best course of action was for me to resign. Winter of 2009/2010 was bleak, to say the least. Kelly’s job paid the bills, but it was right around December that benefits began, and the impact on the paycheck was greater than we anticipated. Many nights were spent wondering if it would ever get better. Several weeks were spent with one or two dollars in the bank at the end.

The turnaround came in February, and financially it couldn’t have been a better time. Rosetta Stone offered me a temporary position (with a small hope of continuing permanently) in the test lab, as a Software Testing Analyst. From the middle of February 2010 to early June, I worked 40-50+ hours a week to make as much money as I possibly could, and thus began the debt-blitz of early 2010. We had a number of things that had piled up that we needed to get dealt with – Crash had been with us nearly a year and he needed some things attended to, I think the car needed something done, and beyond that the goal was to pay off as much debt as we could. This was primarily successful – we brought our monthly budget down a little, and survived to tell the tale. But sure enough, June came (having had the contract extended twice), and Rosetta Stone said “We don’t need you, but we might soon.” Insert large amounts of hopelessness, and begin looking for work again.

I went back to camp for a couple of weeks over summer, and at the end of August I had a call from Rosetta Stone asking for an interview. If there is one thing I can say for RS it is that their communication skills have some things to be desired, but long story short on August 31, 2010 I started as a permanent, part time employee on the test lab’s second shift (5pm-12am, Monday to Friday, limited to 35 hours a week).

And so here we are – it is the middle of December 2010. We have lived with Kelly’s parents for two years (and about two weeks), and the hope of regaining our independence is slowly, slowly rising again. It isn’t that we haven’t enjoyed living with the rest of the family, I know I have. It isn’t that we don’t appreciate the support provided, I know I do. For the most part we all get along, and we seem happy and comfortable. But we don’t want to abuse the privilege. Already we’ve stayed a lot longer than we had initially hoped or expected – and the way we are set up to a large degree reflects that. Our various boxes of ‘stuff’ were haphazardly packed with little regard for what was going where, and this has resulted in several hours of looking for things that were possibly in a box with something else that we have no idea on the location of.

At this stage, the goal I think is for around May next year, if not before. Realistically, we have several thousand dollars allocated (between now and then) to pay off some of the loans that are really hurting our monthly bank balances and preventing us from moving, and then we can find somewhere to move to. Additionally, May seems like an ideal month to move – aside from a trip to the deep south for a wedding it will be warm, and friends will be more available to help.

We certainly aren’t ‘unlucky’ or entirely ‘unfortunate.’ We are finally at a point where we fail to meet the criteria for ‘unable to help oneself’ or ‘powerless.’ And while it will take time, the task ahead is certainly not ‘impossible to accomplish’

The hard part now is waiting. Every day that goes by I wish I could have done something to help us dig ourselves out faster, but I think I’ve done everything I can. From planning when we pay bills to constantly calculating our budget over a month, over a fortnight and for other special events (like Christmas). Our financial life is about as organized as it could possibly be, and the struggle is remembering why we shouldn’t be mindlessly spending money (a temptation that I constantly fight, and sometimes lose). Keeping our mind on the prize, we must keep our eye on the road, for it is rocky and there are monsters.

Oh, Insomnia. Where Did You Come From?

And why won’t you go away and let me sleep?

Well, at least it has been a while since I had trouble sleeping. I just hope it isn’t related to the new firmness of the bed.

Good news and potentially bad news! The good news is, I replaced the severely damaged boxspring that was under our bed and built a new one. The still good news is that it cost around $80 and took 3 days (not working 8 or 9 hours a day either, probably could have finished it in 2 had I worked my butt off). The bad news is that now our mattress has a much more solid support and in turn has become more solid. I’m not sure if that is related to my inability to sleep or if I’m just not nearly tired enough, but it’s entirely plausible.

The design of the new frame thing is simple: I bought 6 pieces of 2″x6″(x8′) and 12 pieces of 1″x4″(x8′) and cut to suit. It’s a queen-sized bed, so the dimensions were supposed to be 60″(W)x80″(L). Turns out the mattress is something like 78″ long, but I’m not going to complain endlessly about it.

With some help from Randy and the use of his circular saw, electric drill and sander, I constructed a basic design. It has a 2×6 frame with two paired 2×6’s down the middle for extra support. There are then 12 slats screwed down on top. To compare this to the old boxspring design, it looked like there were 10 1×2 pieces for slats, something smaller than a 2×6 but bigger than a 1×4 (no, it wasn’t a 2×4 or a 1×6) down the middle, and a not-very-rigid frame around the edges. I’d patched several of the slats on one occasion, and two of these had broken again.

Anyway, here are photos:

This was the break at the foot of the bed. I’d repaired it before, but it’s one of the common landing points when Crash jumps up.

This one is looking from the foot towards the head. You can see a couple of the patches I’d made, as well as the big break in the piece down the middle. Again, all the pieces broken resemble the points where Crash typically lands on the bed.

I kept thinking through the process that I should be taking step-by-step photos, but a) they aren’t really necessary for such a simple thing, and b) by the time I actually got around to doing anything about it it was too late to bother, so I waited until it was done (and then nearly forgot).

This is the frame as it was, completed, sitting in the garage waiting to be brought inside and placed on the metal frame that holds it above the floor (came with the bed, I’m not responsible for that part). You can see the 2×6 around the edges and the double 2×6 down the middle.

Carefully note that at this point the ends of both the mattress and the base are pushed against the wall of our room. This is the difference between the 80″ long base and the 80″ long mattress (ha ha..).

I’d take a wider angle view of the complete bed, but the rest of the room is….camera shy, at this point in time ;-).

In other news, I have some more train photos going up on my Flickr account, and I’ll try to get some new scenery photos up too. I’m hoping to write some kind of ‘newsletter’ or just slightly generalized (with a touch of personal) letters home to New Zealand to family and friends. I’d really like to go home to visit some time, but that (as always) depends on money and our ability to save enough of it. It’s hard to prioritize so often, when there are things we desperately need that cost money, along with things we really want, in conjunction with little things that are really nice (but mount up quickly..). IT WILL HAPPEN. I SHALL HAVE MY SUMMER CHRISTMAS ONCE MORE!

Diary, Model Railroad, 7, etc..

This is really stretching out! Anyway, since the last post I’ve done little but prepared much. Or at least, that’s what I’m telling myself.

What I’ve achieved: Completed painting both sections.

Yes, that’s all.

That said, I have ordered more ballast (since I have one pack of light and two packs of dark – not very close to meeting my requirements), I have ordered more terminal blocks (so I can rewire the second section much more cleanly), I have ordered a 20->24 pin ATX adapter and a 24->20 pin ATX adapter – this should give me both male and female sockets for 20 and 24 pin. I’ve also ordered DPDT switches and momentary on switches – enough to build a control panel. I’ve also printed onto paper some cardstock buildings, and I’ll be gluing those to the poster board that I also acquired at some point in the near future.

My coming plans involve forming a road (I’m thinking a paved road and a dirt/gravel road or two) through part of a section. The problem I’m having is deciding where. I thought I had left space in the track layout, but it seems there are some tight spaces where I’m thinking of putting buildings. It would also be cool to have a rail-in-road space somewhere, I’m thinking along the back where I was planning on putting a one-car container terminal, and building a fence around the facility for security etc. Lastly, I realized that I hadn’t made any account for uncoupling magnets, and I don’t like the idea of them being incredibly visible (unless they can be disguised as something else in some way?) Therefore I either need to lift pieces of track just enough to squeeze magnets in underneath (perhaps thin magnets?) or use stronger ones under the baseboard.

These problems and more to be found and hopefully resolved, soon. Here are some photos.

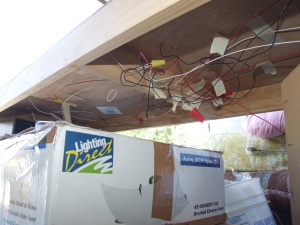
The messy module is seen above a Lighting Direct box (all the way from New Zealand). It is also the one with the least paint (although it is now finished – no photos as yet.) The other module is facing the wrong way, but is otherwise ready for the next step, whatever that may end up being.

Diary of a Model Railroad, Part Three

Finished! Well, not quite. The bench-work is mostly finished. It needs to be sanded off at the ends especially, and I still need to finalize how they will attach to each other. I’m thinking maybe a clip on each side to hold it horizontally, and maybe a door lock thing to hold them in alignment? Other than that, I’m mostly happy. I have photos too, I’ll tell the story from when I started (again – the successful attempt ;-))

July 7th

It starts out with Crash looking like a lazy dog. He really is.

This is an overview of where I was up to on July 7th. The outer frame of one section was complete, and the cuts had been made for the second section, with pieces screwed in to line the up, it was ready to glue and screw together.

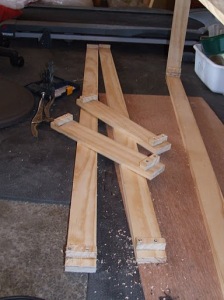
These are the pieces. Give or take (I measured them to be the same length as each other, not to an exact number of inches) they are 2x 5 foot pieces and 2x 1.2 foot pieces. Screwed and glued into each are two 3/4″ x 3/4″ pieces which are used to easily align each piece with it’s join partner. They are then glued at the corners and clamped together for a couple of hours, then screwed. Below, an end has been glued and clamped.

July 8th

I realized that there wasn’t a great deal of structural support, and that for sections that are likely to be pulled out and put away fairly regularly support is probably a good idea. So I measured and cut two support pieces to fit roughly half-way down each section and then drilled three half-inch holes for wiring to go through, and glued and screwed in the same way as the rest of the base. Here, the first is clamped and waiting for glue to dry.

The support supports are gluing on the second frame, when these are dry some more they will be screwed down into the outer frame and the support will be glued to them and then screwed.

I hung out with Crash for a bit while the glue dried!

The frames were finally finished. One is fairly warped, but I don’t plan on exhibiting this layout and it’ll likely be warped with time and transporting anyway, so I’m not overly worried. With the ply nailed down, it doesn’t seem too terrible. I doubt it will cause any major issues (famous last words?)

July 9th

“I claim this foot in the name of Doglandia Forever Woof Woof!”

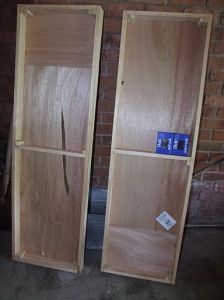
I nailed down the tops this morning. Here are both from the bottom…

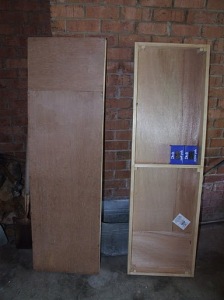
And one from the top. Basically, because they are 5 ft by 1.5 ft each, I used a 4ft square piece of ply and cut two lengths of 4′ x 1.5′ and then two pieces of 1′ x 1.5′ and had a 1′ square left over.

This is the end of one of the sections – both sections have one end like this (I guess the sides weren’t exactly 5′ long!) and one has sides that are a little like this too. They’ll both get sanded back at some point, probably next week now.

I only had 3 incidents while nailing. Two like this, where I nailed at an angle far enough that it poked through the frame. One on each section, and I was able to push them back out so that with some sanding they probably won’t be noticed. I’m considering some 1×4 to go around this all, partly for strength, partly for keeping most track below top surface level (and thus protected a little more). The third incident was near the end of the first section. I’d been using a pair of vice grips to hold the nails to try and keep them vertical, and I elected to do one with just my fingers. Some of you may have seen my earlier tweet that read “OW! Thumb + hammer = pain” – and that’s precisely what happened. Fortunately it is my left thumb that is afflicted, so while it is still pulsing a little (some two hours after I hit it) it’s not causing me too much problem.